Prerequisites:

- A computer with VMware Workstation Player or Pro installed.
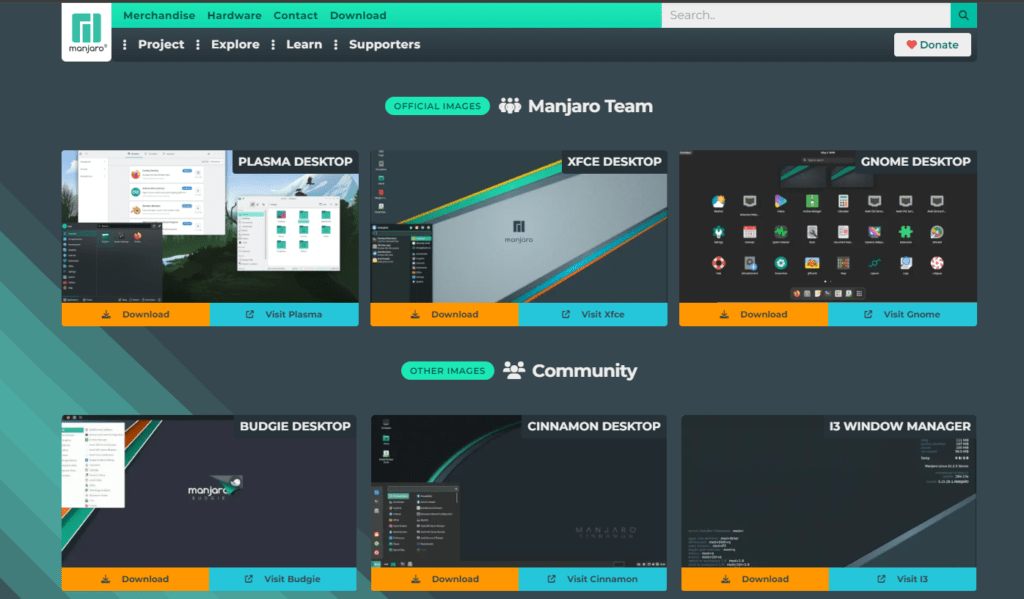
- Downloaded Manjaro XFCE ISO file (https://manjaro.org/download/).
Creating the Virtual Machine:

- Open VMware Workstation.
- Choose “Create a New Virtual Machine” and select “Typical” (recommended for beginners).
- Click “Browse” and select the downloaded Manjaro XFCE ISO file.
- Choose a name and location for your virtual machine.
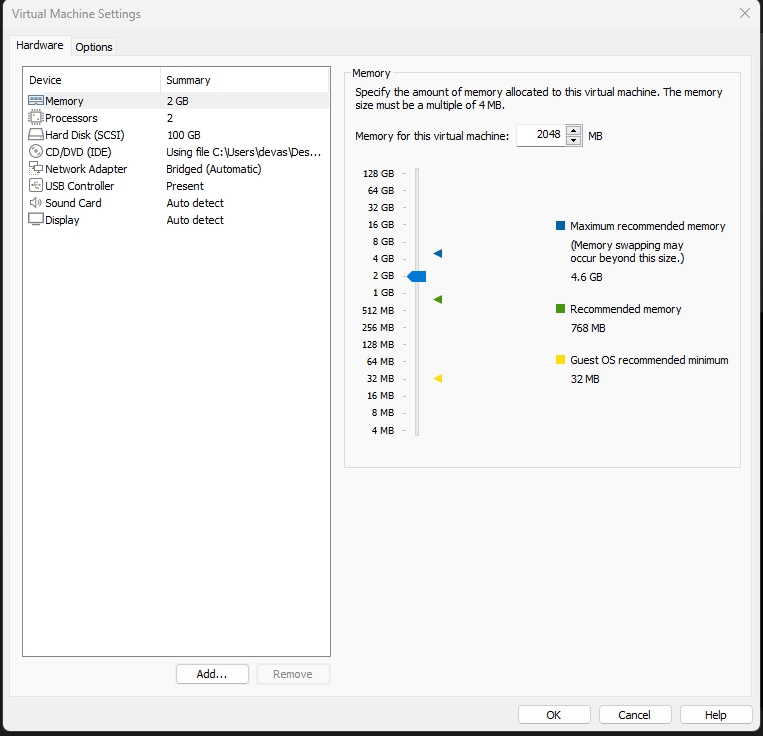
- Specify the amount of RAM to allocate (2GB minimum recommended).
- Select “Store virtual disk as a single file” and choose a disk size (at least 100GB recommended).
- Review the settings and click “Finish” to create the virtual machine.
Installing Manjaro XFCE:

- Power on the virtual machine.
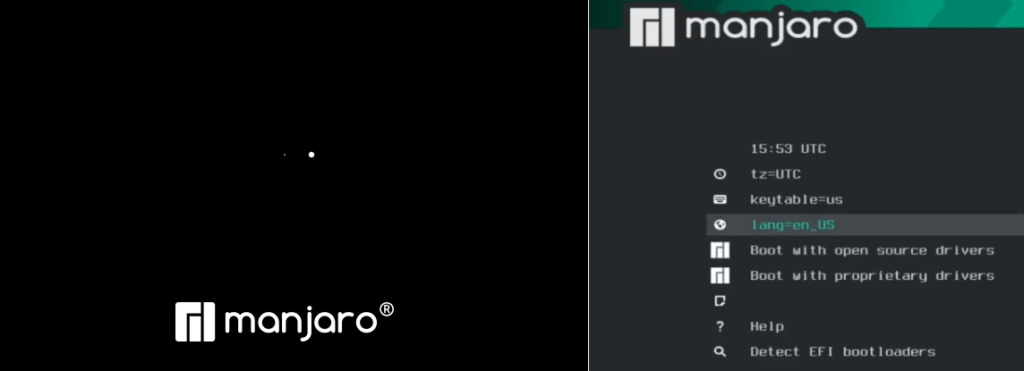
- Choose “Boot from CD/DVD” and press Enter.
- Select “Launch installer” on the Manjaro boot screen.
- Choose your preferred language and keyboard layout.
- In the installation options, you can choose:
- “Erase disk” for automatic partitioning (beginner-friendly).
- “Manual partitioning” for more control over partitions (advanced users).
- Select your desired time zone.
- Set up a username and password for your Manjaro account.
- Optionally, choose additional software packages to install.
- Review the installation summary and click “Install” to begin the installation process.
Post-Installation:

- Once the installation is complete, the virtual machine will reboot.
- After logging in, follow the on-screen prompts to complete the initial setup.
- Install VMware Tools for improved performance and features like shared folders and clipboard sharing. (Instructions can be found on the VMware documentation website).
Additional Tips:
- Make sure your computer meets the minimum system requirements for Manjaro XFCE (https://wiki.manjaro.org/index.php/About_Manjaro).
- Refer to the official Manjaro documentation for detailed installation guides and troubleshooting tips (https://wiki.manjaro.org/index.php/Main_Page).
- There are also video tutorials available online that can provide a visual walkthrough of the installation process ([YouTube search Manjaro Linux XFCE install VMware]).

